I love calendly.com and I have been using it for over three years to help me schedule appointments with external prospects and clients.
Since I am in the business of helping organizations leverage Microsoft Teams for effective collaboration, I thought it would be easy to connect calendly and Microsoft Teams so that calendly automatically schedules a Teams meeting by just adding a link to a Teams meeting in the calendly confirmation.
Well, things got a bit complicated and I quickly discovered that Microsoft Teams generates a unique meeting ID (yes, this is for security) and for a while there were no APIs available to create meetings. In 2019, Microsoft fixed this and enabled its graph APIs to allow this scenario. Specifically, the property isonlineMeeting is now available.

Ever since we all got confined at home, I thought there should be a better way to do this.
Microsoft will tell you they have their own solution called Microsoft Bookings which they made available to all customers in early 2020. While Bookings may work for my use case, it lacks some of the great features that I have been using with calendly and frankly Bookings is more tune to consumers than B2B.
So I thought, let’s use Microsoft Power Automate (Or Azure LogicApps) to automate this process. Power Automate aka Flow (or its Azure equivalent LogicApps) is an automation platform that is bundled with Microsoft 365 and allows automating tasks based on triggers. Think about it like this: If this then that.
So in my case, I needed to create an automation that for each calendar request made by calendly, set the meeting as an online meeting.
Creating a Power Automate Flow
To do this, create a new automated flow:
1. Go to https://flow.microsoft.com and login using your Office 365 credentials
2. Hit Create and select Automated Flow
3. Give it a name “Update calendly meetings invite”
4. Select a trigger “When a new event is created (V3)
5. Connect the event to your calendar
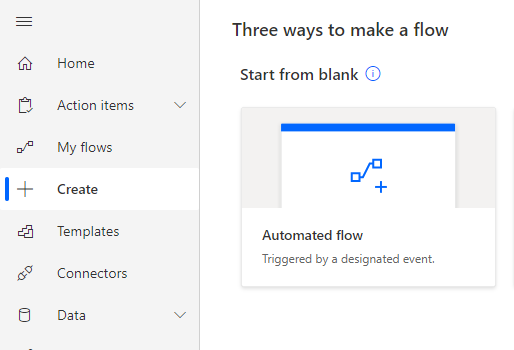
At this time, you have a flow that is triggered every time a new calendar meeting is created.
6. Click on New Step and Search for Condition (Control)
7. In the condition, select the dynamic content “Body” and create a condition “Contains” the word calendly as below. You may need to adjust the condition based on the specifics of how calendly is setup but out of the box, calendly always adds a URL in the body of the email.
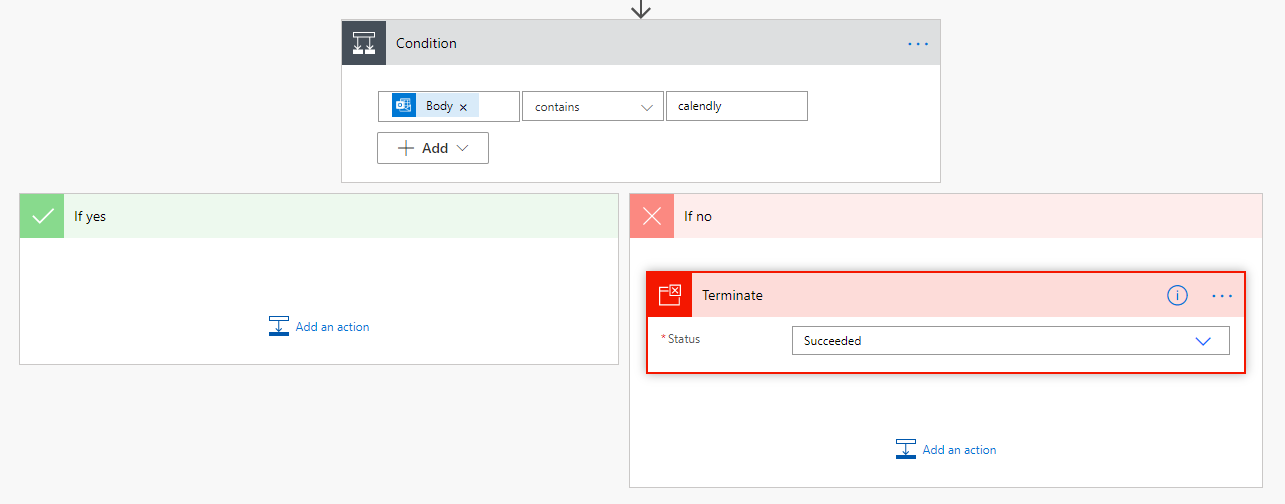
Up to now, things were quite easy and I thought, why did it take so long? Well, I thought, all I need to do it just update the event and set the IsOnlineMeeting property to True. So I looked at the Update event(v4) action and discovered that there was no IsOnlineMeeting property available. That would have been too easy. So this got me thinking, there should be a way to achieve this and Microsoft Graph API to allow to update an event. So I started looking at how to call a Graph API and found this article. I learned that to call a Graph API the easiest way is to create a custom connector.A note for the reader, calling Graph API is a premium connector and thus is not available unless you have a paid subscription. This is why LogicApps which is metered and paid by the action can be handy.
Microsoft Graph API uses the concept of delegated access and requires an Azure AD Application to be created with the proper permissions. Why one will ask? This is again for security reasons. You don’t want any process allowing to access APIs that modify Office 365 without the proper permissions. The good news is, most of you should have no issue creating your own Azure App registration, if you are a user of Office 365 and can login to any other system using your Office 365 credentials you can create an Azure APP app registration.
Creating a Power Automate custom connector for Graph API
Next follow Step 1 in this article
- Create an Azure AD app registration
- At the step to request API Permissions, make sure to select Calendars.Read or Calendars.ReadWrite (otherwise your API call will fail)
- Make sure to keep the Application ID and Client Secret handy because you will need it down the road. Also, when creating a client secret pay attention to how long the secret will be valid. The default is one year. Select Never expire if you don’t want to have to come back in 1 year
Note: If you can’t access Azure AD registration, this means your organization has blocked you and you will need to request someone to do this for you.
contact a member of Withum’s Digital and Technology Transformation team.
Once we have an Azure AD App created (with ApplicationID and SecretID), it is time to create a custom Power Automate connector (or LogicApps, if you are going the Azure route).
To do this, head back to Microsoft Power Automate at https://flow.microsoft.com login and expand Data and select Custom Connector. Don’t worry, I’ve done most of the leg work for you. Download this file – this is the Swagger definition for the API.
1. Click on New Custom Connector and select Import from OpenApi file.
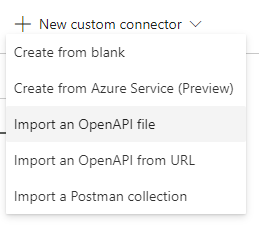
2. Give the connector a name, for instance “MS Graph Connector — Update Calendar” and hit continue.
3. You will see the following screen, click Security ->
4. Now enter your Application ID in the Client Id field and Client Secret in the Client Secret field
5. Enter https://graph.microsoft.com in the resource URL
6. Hit Create Connector
7. Go back to the 2. Security Tab and retrieve the Redirect URL (in a previous version of this wizard, there was a bug and the redirect URL would not appear.
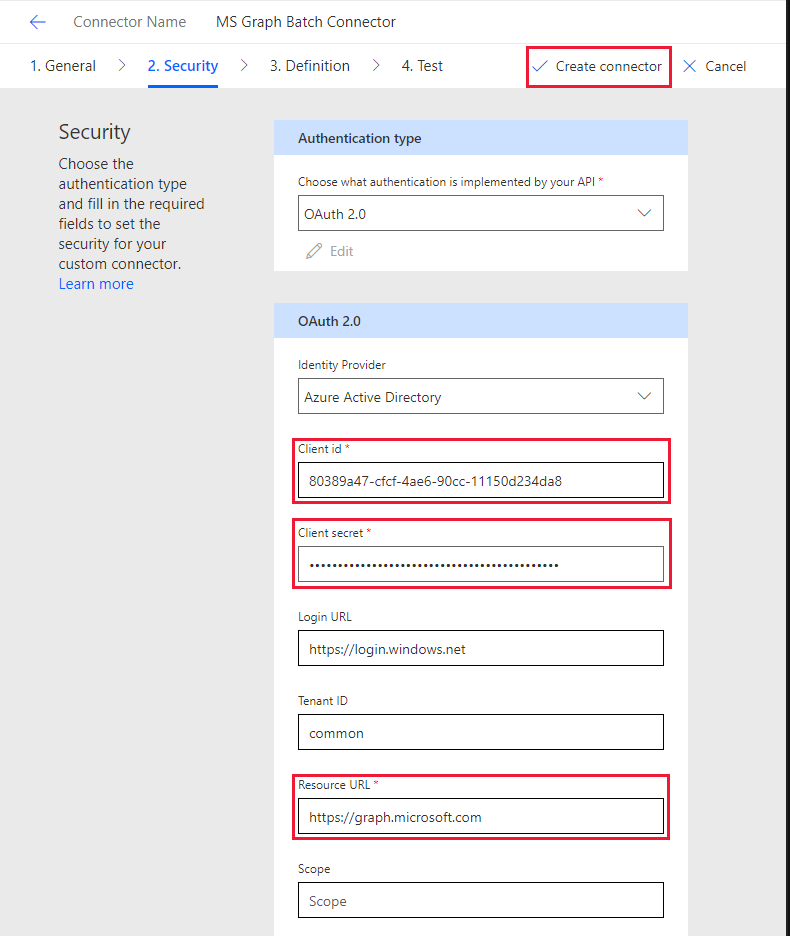
8. With the URL handy, head back to the Application in Azure AD you previously created and select Authentication. In the Wen Redirect URL, Enter the redirect URI with the URL from above. In most cases, it should be:

This is required to tell the application how to get back to the connector upon authentication.
Now time to test the custom connector. Go back to Power Automate and in the Page 4 of the connector, click on new connection, pick your Office 365 account and select login.

Click update connector.
The hard work is done. Let’s head back to the flow we created earlier and if the yes condition branch, Add a new action, click on the Custom Connector type and you should see:
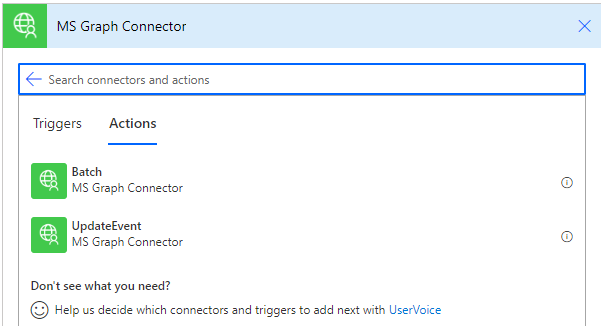
Select UpdateEvent and you should see this, update the field as below, you can select a dynamic property by clicking on the Add a dynamic value.
- ID is the meeting ID that trigger the flow
- ReminderMinutesBeforeStart: enter 15 or whatever value in minutes
- IsOnlineMeeting, set to Yes
- OnlineMeetingPRofider: enter this value teamsForBusiness
- contentTYpe: enter html
- Content enter Body is the content of the body generated by calendly, we are just adding it back
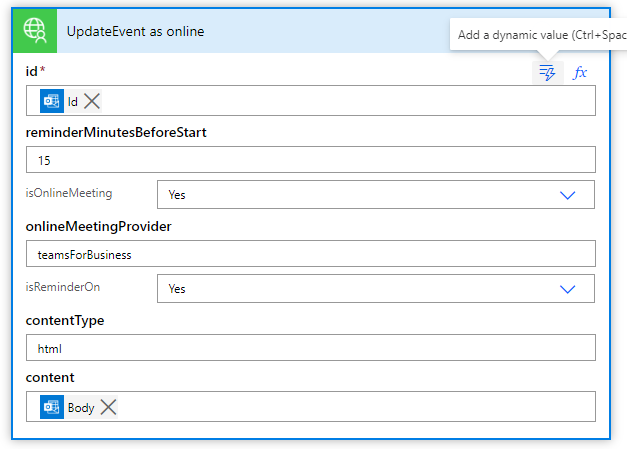
Save your flow.
Make sure to activate the flow and test it. To test, create an event thru calendly and watch the flow update the calendar invite and append a Teams meeting automatically.
If you are struggling, feel free to book a 15 minutes meeting with me (yes, powered by Calendly and this will be a Teams meeting) https://calendly.com/daniel-cd/15-minute
A big thank you to my colleagues Phil Demro and Val Orekhov who helped me troubleshoot and brush up my dev skills.
Digital and Technology Transformation
Reference articles:
Create a Microsoft Graph Batch JSON Custom Connector for Microsoft Flow
Calling Microsoft Graph from Microsoft Flow (and other daemon) with delegated permissions by
Laura Kokkarinen
Creating custom flow connector sample by Alex Tofan
Custom Connector by Mathew McDermott


